리액트 라이브러리만 써오다가, 바닐라 JS로 무언가를 만들 생각을 하니 벌써부터 막막하다.
하여튼, 넘블이라는 곳에서 챌린지를 신청하여 바닐라JS로 SPA를 만들어보기로 했다.
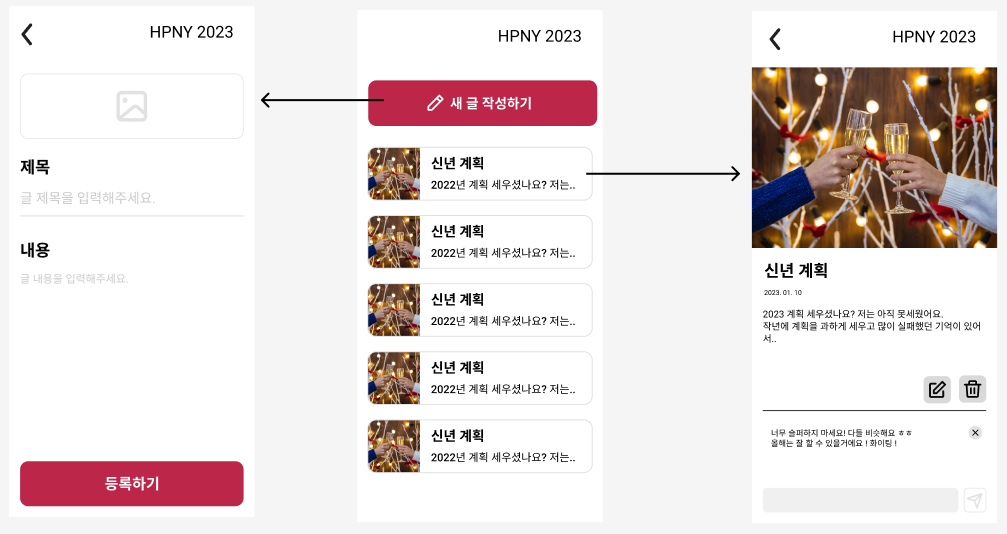
가이드라인 페이지는 아래와 같다.
필요한 조건은
- API를 통해, 데이터를 불러와 동적으로 메인페이지를 구성해야함.
- 디테일페이지에서 해당 데이터를 불러와, 구성해주어야함.
- 글쓰기페이지
중요한거는 SPA로 구현을 해야한다는 점이다. 기존의 자바스크립트는 페이지를 이동할 때마다, url에 따라 정적파일을 서버로부터 받아오는 형태라면 SPA는 첫 로드시에 모든 html파일들을 다운받아 놓고 사용한다.
페이지는 굉장히 단순한데, 결국 라우팅을 어떻게 처리하냐가 관건일 것 같다.
그래서 바닐라JS로 라우팅을 구현하는 것에 대해 구글링을 시작했다.
방법은 두 가지가 있는 것 같다.
- historyAPI를 활용 (pushstate, popstate)
- hash를 활용
일단 hash를 사용하는 것이 가장 단순해보여서, hash를 활용하여 SPA를 구현해보기로 하였다.
대충 구현하는 순서는 아래와 같이 짜보았다.
- 가장 먼저, 데이터를 받아와서 메인페이지에서 목록으로 뿌려주고
- 각 포스트를 div로 만들어 고유 id값을 넣어준다.
- 각 포스트의 id값을 활용한 hash로 url을 구성해주고,
- hashchange 이벤트를 활용하여, url주소가 바뀔때마다 구성html을 바꾸어주면 된다.
일단 데이터를 불러와서 목록에 펼쳐주는 작업을 진행했다.
(이 조차도, 바닐라js를 간만에 사용하다보니 헷갈렸다.;;)
const getData = async () => {
  try {
    const response = await axios.get(`${baseUrl}/posts`);
    console.log(response.data.data.posts);
    postlist = response.data.data.posts;
  } catch (error) {
    console.log(error);
  }
};


//? ------- 메인페이지에 포스트목록 뿌려주는 작업  --------------
    let postTemplate = document.createElement("div");
    postTemplate.classList.add("postListBox");
    postlist.map((post) => {
      let Img = document.createElement("img");
      Img.classList.add("postListImg");
      Img.src = post.image;
      let postBox = document.createElement("div");
      postBox.setAttribute("id", post.postId);
      postBox.setAttribute("class", "postBox");
      postBox.addEventListener("click", (e) => {
        console.log(e.target);
        location.href = location.origin + location.pathname + "#" + e.target.id;
      });
      postBox.innerText = post.title;
      postBox.appendChild(Img);
      postTemplate.append(postBox);
    });

    document.getElementById("postlist").append(postTemplate);
    document.getElementById("postPage").addEventListener("click", (e) => {
      console.log(e.target);
      location.href = location.origin + location.pathname + "#" + e.target.id;
      console.log(location.hash.substring(1));
    });
지금은 아래와 같은 화면이 보인다. 일단 포스트의 타이틀만 보이게끔 구현했다.
( 최대한 빨리 라우팅부분으로 넘어가기위해)
이제 각 포스트의 타이틀을 누르면, 그 div의 id값을 가져와서 hash가 포함된 url로 구성해주어야 한다.
    span.addEventListener("click", (e) => {
      console.log(e.target);
      location.href = location.origin + location.pathname + "#" + e.target.id;
    });
postlist 안에 있는 것들에 onclick 이벤트를 적용해주어, 이벤트 타겟의 id값을 가져오는 방법으로 구현하였다.
이제 포스트의 타이틀을 누르면, 그 포스트의 포스트아이디값으로 url이 변한다.
그리고 중요한 것은 url이 변해도 서버로부터 요청을 하지 않는다는 것이다. SPA의 핵심
이제 url에 따라 페이지를 구성하는 html을 변경해주어야 한다. 이제부터가 본격적으로 SPA를 구현함에 있어, 중요한 부분이란 생각이 든다.
const renderPage = async () => {
  console.log("변경");
  await getData();
  const hash = window.location.hash.replace("#", "");
  console.log("주소", hash == "");
  const mainPage = document.getElementById("root");

  //! ------------ 상세페이지는 hash값이 넘버일때만 --------------------
  if (Number(hash)) {
    console.log("디테일페이지");
    await getDetailData(hash);
    console.log(postDetail);
    mainPage.innerHTML = `
    <div id="root">
    <div class="header">Happy New Year 2023</div>
    <div
    class="detailCtn"
    ><Img
    class="detailImg"
    src=${postDetail.image}/>
    <div
    class="contentWrap"
    ><div
    class="postTitle"
    >${postDetail.title}</div>
    <div>${postDetail.createdAt}</div>
    <div
    class="postContentBox"
    >${postDetail.content}</div>
    <div
    class="buttonDiv"
    >    <button
    id="postDeleteBtn"
    class ="postDeleteBtn"
    >삭제</button></div>

    </div>
    <div
    class="commentWrap"
    id='commentList'
    >
    </div>
    </div></div>
    </div>

    </div>
    `;

    const deletBtn = document.getElementById("postDeleteBtn");

    deletBtn.addEventListener("click", () => {
      deletePost(hash);
    });

    //? ------- 상세페이지에 댓글들 뿌려주는 작업  --------------
    if (comments.length === 0) {
      let commentCtn = document.createElement("div");
      commentCtn.innerText = "댓글이 없습니다";
      document.getElementById("commentList").appendChild(commentCtn);
    } else {
      let commentCtn = document.createElement("div");
      commentCtn.classList.add("commentCtn");
      comments.map((comment) => {
        let commentBox = document.createElement("div");
        let commentDeleteBtn = document.createElement("button");
        commentDeleteBtn.classList.add("commentDeleteBtn");
        commentDeleteBtn.id = `${comment.commentId}`;
        commentBox.setAttribute("id", comment.commentId);
        commentBox.setAttribute("class", "commentBox");
        commentDeleteBtn.addEventListener("click", (e) => {
          deleteComment(e.target.id);
        });
        commentBox.innerText = comment.content;
        commentDeleteBtn.innerText = "삭제";
        commentBox.appendChild(commentDeleteBtn);
        commentCtn.appendChild(commentBox);
        document.getElementById("commentList").appendChild(commentCtn);
      });
    }
  } else if (hash == "postPage") {
    mainPage.innerHTML = `
    <div
    class="postPageCtn"
    ><h1
    class="postPageTitle"
    >새해 인사 한마디 적고가시지요..</h1>
    <h2
    class="inputTitle"
    >제목</h1>
    <input
    placeholder="글 제목을 입력해주세요"
    onchange="titleChange(this)"
    />
    <h2
    class="inputTitle"
    >내용</h2>
    <input
    placeholder="글 내용을 입력해주세요"
    class="contentInput"
    onchange="contentChange(this)"
    />
    <button
    class="postBtn"
    onclick='postClickEvent()' >등록하기</button></div>
    `;
  } else {
    mainPage.innerHTML = `
    <div id="root">
    <div class="header">Happy New Year 2023</div>
    <div class="postBtn" id="postPage">새 글 작성하기</div>
    <ul id="postlist"></ul>
  </div>
    `;
    //? ------- 메인페이지에 포스트목록 뿌려주는 작업  --------------
    let postTemplate = document.createElement("div");
    postTemplate.classList.add("postListBox");
    postlist.map((post) => {
      let Img = document.createElement("img");
      Img.classList.add("postListImg");
      Img.src = post.image;
      let postBox = document.createElement("div");
      postBox.setAttribute("id", post.postId);
      postBox.setAttribute("class", "postBox");
      postBox.addEventListener("click", (e) => {
        console.log(e.target);
        location.href = location.origin + location.pathname + "#" + e.target.id;
      });
      postBox.innerText = post.title;
      postBox.appendChild(Img);
      postTemplate.append(postBox);
    });

    document.getElementById("postlist").append(postTemplate);
    document.getElementById("postPage").addEventListener("click", (e) => {
      console.log(e.target);
      location.href = location.origin + location.pathname + "#" + e.target.id;
      console.log(location.hash.substring(1));
    });
  }
};
가장 먼저, 페이지는 3개의 페이지다.
- 메인페이지 (목록을 보여주는 페이지)
- 포스트페이지 (글 작성을 하는 페이지)
- 디테일페이지 (메인페이지에서 클릭 시, 넘어가는 상세페이지)
여기서 디테일페이지는 postid로 url을 구성하여, url에서 다시 postid를 활용하여 하나의 데이터만 get요청하는 방식을 생각했다. 따라서 디테일 페이지만이 url에서 number타입을 가진다.
그래서 위와 같이, number타입인 경우만을 예외처리하여 조건문을 완성했다.
어쩌다보니, 하나의 파일에 더럽게 코드가 작성이 된 것 같다.
저기 위에 innerHtml 부분은 따로 js파일로 빼서 모듈화로 import하는게 훨씬 깔끔할 것 같다.
일단 빠른 구현이 먼저니...
위와 같이, url 별로 다른 html을 보여주는 것들만 했다면 이제 거의 다 완성이라고 볼 수 있다.
이제는 존재하는 데이터들을 구성에 맞게 배치만 해주면 된다.
그리고 버튼이나 인풋에 이벤트리스너를 통하여 자잘한 기능을 구현하는 정도?
// ---------------  게시글 삭제버튼 ------------------
    deletBtn.addEventListener("click", () => {
      deletePost(hash);
    });

// ----------------  댓글삭제버튼  -------------------
        commentDeleteBtn.addEventListener("click", (e) => {
          deleteComment(e.target.id);
        });


// ----------------  인풋창 이벤트함수 관리  ---------------
const contentChange = (e) => {
  console.log(e.value);
  title = e.value;
};

const titleChange = (e) => {
  console.log(e.value);
  content = e.value;
};

const postClickEvent = () => {
  postData({
    title: title,
    content: content,
    image:
      "https://img.freepik.com/premium-photo/small-tricolor-kitten-meows-floorroom_457211-10960.jpg?w=1060",
  });

};
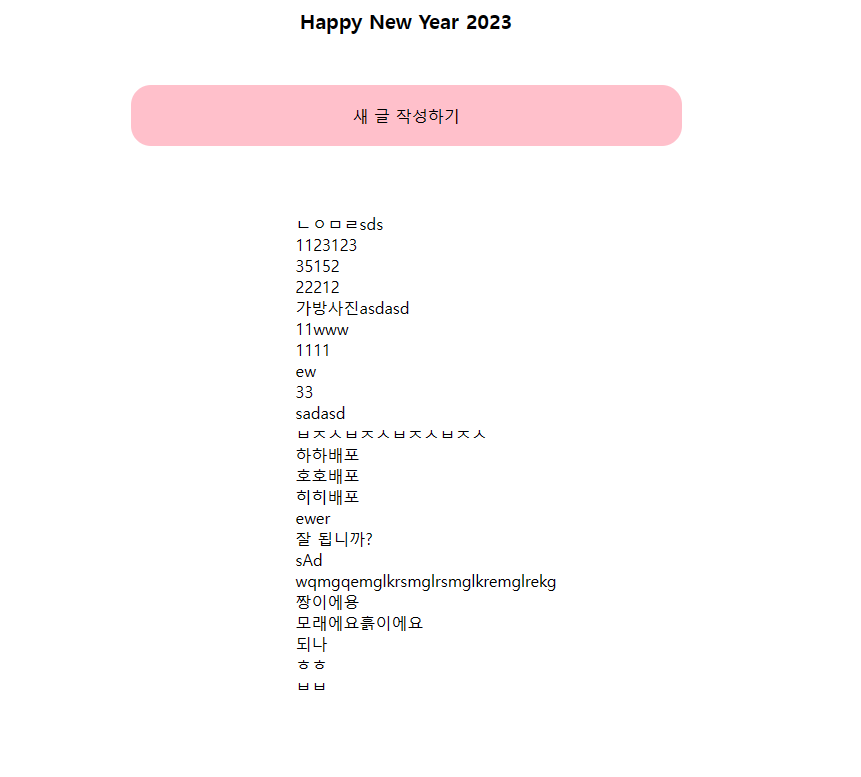
일단 오늘 하루 종일 완성된 SPA 결과물은 아래와 같다.
기존 피그마 디자인이랑은 많이 다른듯...??
하... 급하게 만드느라 기존에는 블로그에 기록하면서 코드를 짜는데, 코드만 짜느라 회고록을 자세히 못쓰겠다....
하여튼, 리액트만 쓰던 나를 반성하게 만든 챌린지였다. 바닐라JS로 여러가지 만들어보자;
일단 소스코드는 아래 링크 (배포 아직 안했고, 코드도 개더러움)
https://github.com/kkkimjiyong/VanillaJS_SPA
GitHub - kkkimjiyong/VanillaJS_SPA
Contribute to kkkimjiyong/VanillaJS_SPA development by creating an account on GitHub.
github.com
'프로젝트' 카테고리의 다른 글
| 테오의 스프린트 14기 후기 (0) | 2023.03.19 |
|---|
